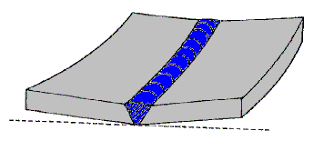
Welding causes distortion, which is a severe condition, and understanding what causes distortion is essential for minimising or totally eliminating it.
Heat distortion happens when an inconsistent amount of heat is given to a metal region during welding. Some thermal distortion is so extreme that the piece of metal being welded becomes useless.
Controlling the quantity of heat distortion in the metal you’re working on isn’t an exact science, it varies based on the thickness and kind of metal, as well as the welding procedure used to form the weld.
There are various things you can do to reduce the amount of heat distortion. However, you can also do a test on a scrap piece of metal identical to what you will be working on. Testing the metal’s heat tolerance can help you generate welds with minimal distortion throughout the welding process.
Why does heat distortion happen?
A metal bar expands in all directions when it is uniformly heated, and when it cools, it compresses evenly to its original size.
As a result, heat isn’t the primary concern, if you heat a piece of metal equally, it would all expand at the same pace with no distortion or warping.
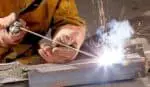
Welding, on the other hand, only warms a tiny region radiating from the point of contact with the welding arc, causing just the heated area surrounding the arc to expand, resulting in deformation.
Consequences of heat distortion.
• Your equipment will not function properly.
• You might incur additional labor expenses as a result of your vendor wasting time adding unnecessary welds or producing a faulty product a second time.
• The additional welds and adjustments lengthen the lead time.
So what can we do to reduce the chances of distortion?
10 tips on how to minimize heat distortion
1.) Intermittent welding- When the design enables it, employing intermittent welds rather than continuous welds can save up to 75% of the weld metal and greatly minimise shrinkage and distortion.
2.) Creating a weld sequence- The right weld sequence entails inserting weld metal at various places of the assembly such that shrinkage occurs only in one location at a time and is counteracted by consecutive welds.
In full joint penetration groove welds, alternating welds on both sides of the neutral axis is extremely effective. Intermittent welds alternate down weldment balancing shrinkage in fillet welds.
3.) Avoid overwelding- The larger the amount of metal in a joint, the greater the shrinkage forces. Correctly sizing a weld for the joint requirements not only reduces distortion but also saves weld metal and time.
The quantity of weld metal in a fillet weld may be reduced by using a flat or slightly convex bead, while the amount of weld metal in a butt joint can be reduced by adequate edge preparation and fit up.
Excess welding metal in a very convex bead does not enhance code permissible strength, but it does increase shrinkage forces.
4.) Use the fewest number of weld passes- When transverse distortion is a concern, fewer passes with a bigger electrode are preferable than numerous passes with smaller electrodes.
With each pass, the shrinkage adds up. Shrinkage will accumulate with each weld pass throughout the welding process.
5.) Welding Positioning- Welds should be placed towards the part’s neutral axis or centre. This positioning provides less leverage for shrinkage forces to pull plates out of alignment. Avoiding pushing the plates out of alignment will reduce product deformation.
6.) Equilibrium on the Neutral Axis- Balancing your welds around the product’s neutral axis and welding on both sides of the plate to counteract one shrinkage force with another.
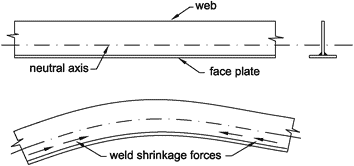
Because the forces will oppose each other, this equilibrium will minimise distortion.
7.) Use the backstep method- This is useful since the preceding weld creates a constraint, reducing distortion. This method may not be applicable in all circumstances though.
8.) Offset distortion using pre-bent components- If we anticipate distortion and can estimate which way the welded structure will bend, we may pre-bend the part so that it is straight after welding.
9.) Prepare for shrinking forces- Presetting the pieces before welding allows shrinkage to do positive work. To resist distortion, presetting, prebending, or prespringing the pieces to weld use opposing mechanical forces.
For example, while presetting the plates, prolonging the top of a weld groove can assist prevent distortion. The final weld is somewhat longer than it would have been if it had been done on a flat plate.
10.) Reduce welding time- The amount of metal heated can be reduced by reducing the amount of time spent welding. Heat reduction minimises shrinkage and consequently distortion.
Since we know that testing your piece of metal before you start welding can minimize the risk of heat distortion, let us understand how we perform this test.
1.) To begin the testing procedure, set the two scrap metal pieces on top of your welding table.
2.) Next, turn on your MIG welder and adjust the wire speed and heat setting to suit the metal you’ll be working with.
If you’re not sure what settings to use, there’s usually a chart linked to MIG welders that shows you the suggested settings for the gauge of metal you’ll be welding with.
3.) You may now put on your welding helmet and gloves after you’ve chosen the settings to use for the test pieces.
4.) After you’ve put on all of your welding safety gear, arrange the scrap metal in the manner in which the larger pieces will be fused.
5.) Once the scrap metal pieces are in place, align the welding wire coming out of the MIG gun with the location where the two pieces of metal connect.
6.) When your MIG welding gun is in the right position, do a tack weld on the two pieces of metal, then move the MIG gun to the opposite end of the metal pieces and repeat the tack weld.
7.) This process should be done until you have a tack weld every two to three inches along the length of the two scrap metal pieces.
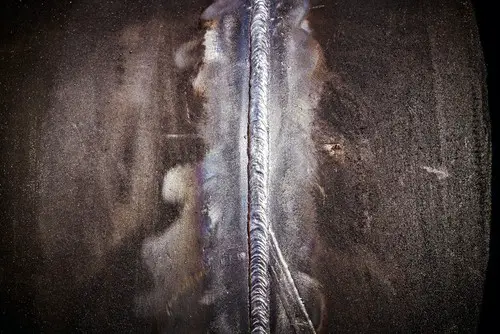
8.) You are now ready to run a weld bead along the tacked weld joint after you have put tack welds along the piece of metal.
9.) Allow a weld bead to cool after it has been applied along the length of the metal before attempting to handle it.
10.) After the metal has cooled, check the test pieces for any bended portions of metal. Pay notice to the direction the metal moved if you detect any regions of heat distortion.
11.) Stainless steel is more susceptible to heat deformation than carbon steel. Now that you’ve observed how and where the metal is likely to deform, you may start welding your work piece.
Conclusion
Heat distortion is a common issue in welding, and it hampers the overall aesthetic and quality of your finished product. But there are ways to reduce its occurrence so you can follow the instructions properly before you start welding.