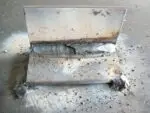
Stainless steel will warp when you weld it. If you try to weld parts in stainless steel without any restraining measures, left in a free state, it will warp when you weld it.
So, if you need to weld stainless steel, you need to work to limit the natural distortion from welding as much as possible.
Stainless Steel
To begin with, stainless steel is an alloy that is iron based with a percentage of chromium mixed in that may vary somewhere between 11% to 30%. Chromium contributes to stainless steel’s resistance to rust. It is a sturdy metal that resists corrosion from chemicals, liquids, or gaseous sources.
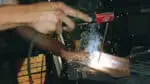
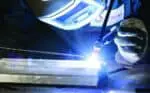
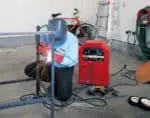
The most commonly used welding process when working with stainless steel is TIG welding. Since this welding process has a very low input of heat, it is ideal for thin materials like stainless.
This is important because stainless steel will retain heat. If the welding temperature increases too much, stainless steel can warp, even after welding during the process of cooling.
Distortion, Warpage, or Shrinkage
Distortion happens because there are high levels of heat involved. At temperatures in the neighborhood of approximately 9000°F, the metal’s molecules move very quickly, altering the shape.
Then because it is difficult to maintain this level of heat and to manage an even application where you are working, the molecules also cool quickly causing distortion.
This problem is particularly acute when welding sheet metal because it will be both thinner and lighter, making it even more prone to warping. The positive aspect of this is that it is easier to sand, grind, or buff, making your preparation quicker.
The Why of Avoiding Warping
There are several reasons to avoid distortion when welding. To begin with, the pieces will no longer lay flat. Then they don’t fit correctly and finally, your project may not function.
But equally important is the fact that the weld itself will probably be compromised. The failure of a weld because of distortion can be ruinous. Plus, your project will probably not be attractive aesthetically.
The real risk happens during the cooling process. The metal wants to return to its original state while cooling. If the stainless is not restrained with clamping of some type, it would return to its original shape once completely cooled.
Can A Weld Warp?
Actually, yes, as the same principles apply to the weld. Weld material will expand while it’s hot and will contract when it cools. If by chance the base metal is warped, the weld will not be able to contract in a normal way, making it uneven and thin over the joint and creating unwanted shrinkage.
Practices for Limiting and Preventing Warping
When welding stainless steel, there are several things you can do to limit distortion and the risk of warping.
Keep in mind that MIG welding will introduce new material within the joint making it more prone to distortion. For this reason, TIG welding is the preferred method.
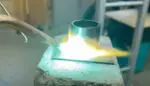
1.) Move quickly. Create the pool and weld immediately. Because stainless steel has very low thermal conductivity, heat will build up fast, so welding quickly can make a difference in distortion forming. The longer you need to apply a weld, the more heat you are applying to the stainless steel.
2.) Try clamping a piece of copper or brass behind or underneath the seam of your weld. This can serve as a cooling tool, often called a “heat sink”. The idea is that the copper or brass will absorb the heat and not permit a burn-through. You may also manage to weld your entire seam without interruption.
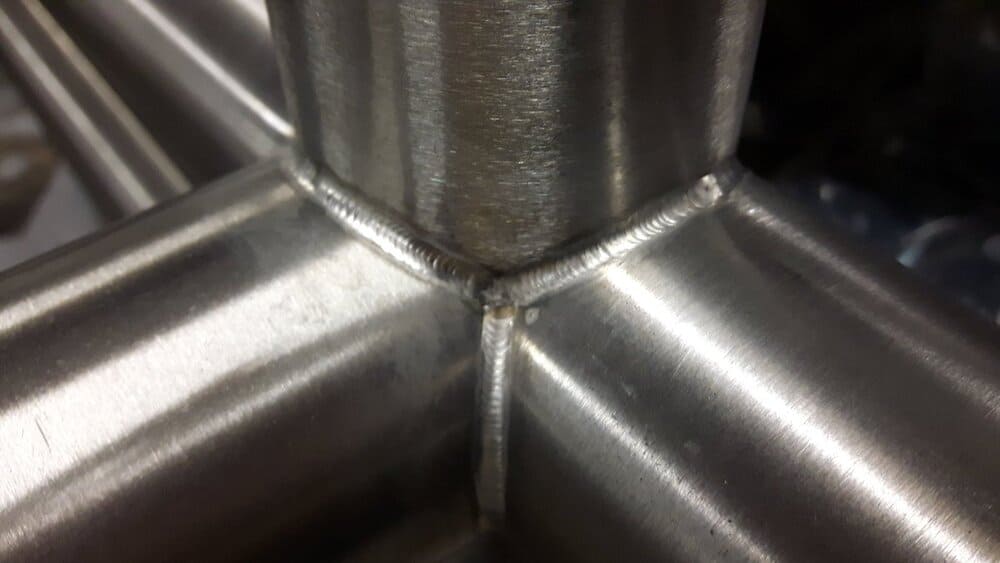
3.) Try intermittent welding. Does your project really require a long bead? With intermittent welding, you leave evenly spaced openings between your welds instead of one long continuous bead that runs the entire length of the joint. By using intermittent welding, you are leaving untouched and non-warped metal sections among heat touched sections, allowing room for a bit of expansion.
3.) The Backstep. Like intermittent welding, the first welds will be spaced apart. Afterward, a bead that is linear will be applied. This method is often used when a really strong heavy duty weld is necessary.
The first welds or button tacks are applied at a minimum temperature. When it’s time to apply the second welds, the bead will be applied backward in the direction of the most recent tack button. This is done until you have a complete bead.
The great thing about this technique is that you are not using a long bead that requires placing continually increasing heat across your stainless steel. Heated sections will expand into unheated sections and the cooling will be relatively even throughout your base of stainless steel.
4.) Avoid Multiple Passes. Sometimes the use of a larger electrode instead of a smaller electrode will let you make a lesser number of passes.
Since the effects of repeated passes of heating and then cooling will be cumulative, more passes translate into more risk of warpage. However always select a correct size electrode for a project.
5.) Find Your Neutral Axis. The neutral axis should run through the geometric center of your stainless steel. This is the point where strain and metal stress will be minimal. If it is possible to place your welds along this axis or near it, this will contribute to preventing distortion.
6.) Anticipate Warping. Failing to anticipate potential problems is one of the quickest routes to failure. Study your entire project beforehand. Study what you need to weld and how you intend to proceed. Choose the best method for the project at hand.
7.) Presetting. One of the commonest procedures to limit distortion is the presetting of the parts you intend to weld. You can place the pieces together as you intend to weld them and execute a few test welds.
Tack welds can be placed to keep your parts together. If you don’t weld the entire project at once, that’s okay because the more time that passes, the more time there is for the metal to cool back down after each intervention.
8.) Shrinkage Can Be an Advantage. Really? Yes, use it if you are presetting parts. You place your parts at the point you intend for them to join. Check for fit and gaps. Discover where the two pieces may not fit correctly. You can file or sand the pieces that don’t square up but need to be joined.
An example is pieces that need to be welded at a 90° angle. When presetting cooled pieces, they may appear to fit great, but during welding, shrinkage will probably happen to make the fit imperfect.
Just bend one of the two pieces slightly back so it’s a tad less than 90°. During your welding, the shrinkage should pull it into place if your bend was accurate.
9.) Restraining Devices. It is not always possible to preset a piece with tack welds. So, you may need to use clamps, jigs, or vises to keep your pieces at the desired angle when welding.
These restraining devices will help limit distortion if they are placed correctly. It is preferable to use a device rather than permitting expansion or contraction with no restraint at all.
10.) Avoid Sequencing. It’s not necessary to do your welds in a one, two, three order. Better to move around and weld out of sequence to minimize any distortion. Don’t work on welds that are adjacent, or if you must, limit the number to avoid cumulative heating effects and cooling effects.
11.) Resolve problems immediately. Mitigate any distortion before the pieces have cooled down entirely and the warping becomes permanent. For example, you can peen to counteract any shrinkage in a weld, or you can apply thermal stress relief by exposing a weld with shrinkage to heat after the weld has been completed.
Practice makes perfect. Any welder knows that practice is a part of a daily routine and it’s the part that will get you to your objectives more quickly and accurately in the long run.